
Alma Anonymization: How to schedule a report to be auto-run/auto-exported, and how to download and verify that a report is working
July 18, 2024
Overview
Scenario: Due to the Anonymization of Alma user fulfillment data, you would like to capture the number of items that local students have checked out from your collection before the data is anonymized in 7 days; this data is useful for analysis of collection use by students, which may help to determine if there is a correlation between library material use and academic performance. One approach would be to create an Analytics object that allows you to run a daily report within your Institution Zone that captures the total number of loans for local patrons who have checked out an item 3 days ago from your local collection; the three-day time period is necessary due to the delay in transferring of data from Alma to Analytics.
The following procedure assumes that you have the query/analysis already created in Alma Analytics as we will only be demonstrating how to schedule the report for a query/analysis that already exists in Analytics. We will be creating an Analytics object within Alma and using it to produce the scheduled report that will be sent via SFTP to the CARLI Files server folder for your institution.
Additionally, we will demonstrate how to download the reports from the CARLI files server folder for your institution on a regular basis and verify that the delivered report contains the expected data.
Table of Contents:
Testing the S/FTP connection definition “CARLI Secure FTP Server (key authentication)” is configured and working
Working with the Analytics Object List: Roles Required
Creating an Analytics Object in the Analytics Object List
Scheduling an Analytics Object report for delivery via FTP
Downloading of the reports delivered via FTP to your institution’s FTP folder on the CARLI Files server
Verification of the received reports on a regular basis
Testing the S/FTP connection definition “CARLI Secure FTP Server (key authentication)” is configured and working
We will begin by testing if the S/FTP connection definition for the CARLI Files server is configured and working in your Alma instance. Knowing in advance that the CARLI Files server S/FTP connection definition “CARLI Secure FTP Server (key authentication)” is available in your Alma instance and is working properly will be important for a later step in the “Scheduling an Analytics Object report for delivery” section.
Note: To test your integration profile, your user account must have the following role:
General System Administrator
Please refer to the Ex Libris page on Managing User Roles if you need to add a role or determine if your user account has this role.
To test the S/FTP connection for the CARLI Files server,
- Log into Alma.
- From the Alma left menu bar, select Configuration.
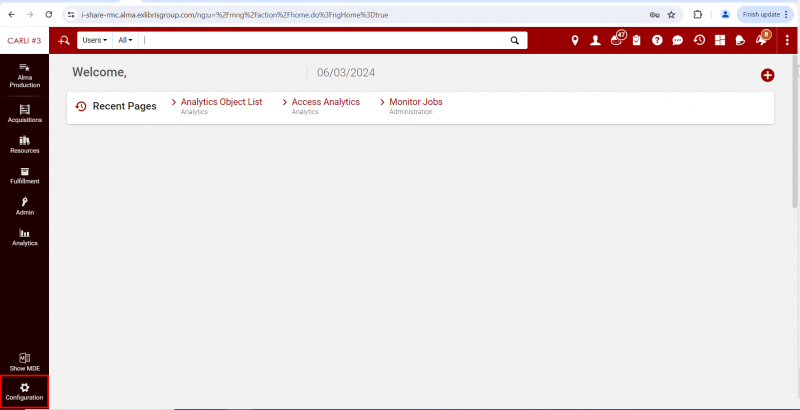
That will open the Alma configuration menu.
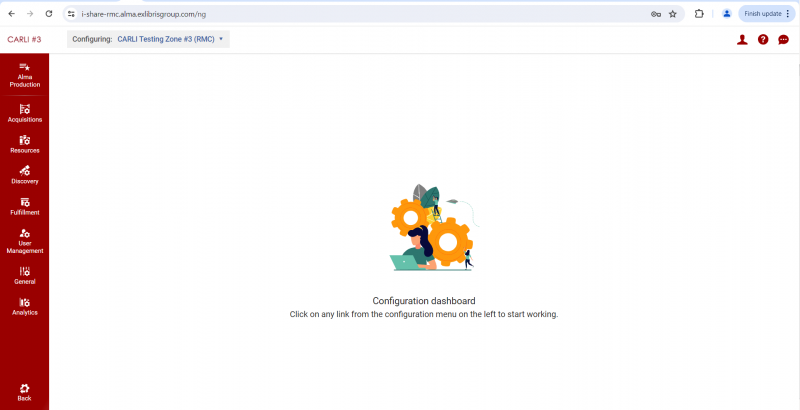
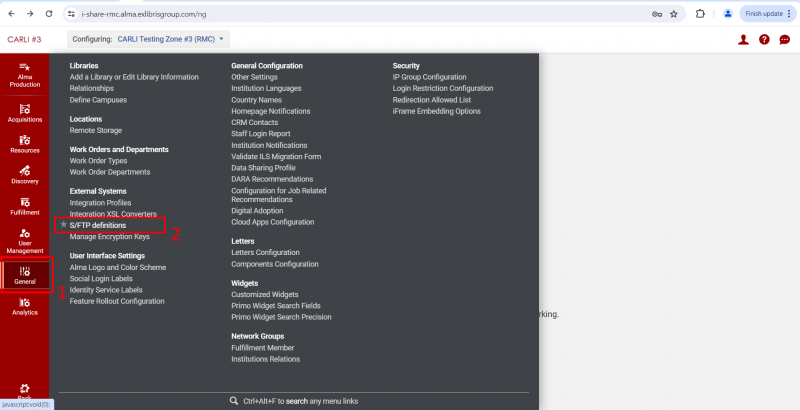
- From the Alma left configuration menu, select General > External Systems > S/FTP Definitions.
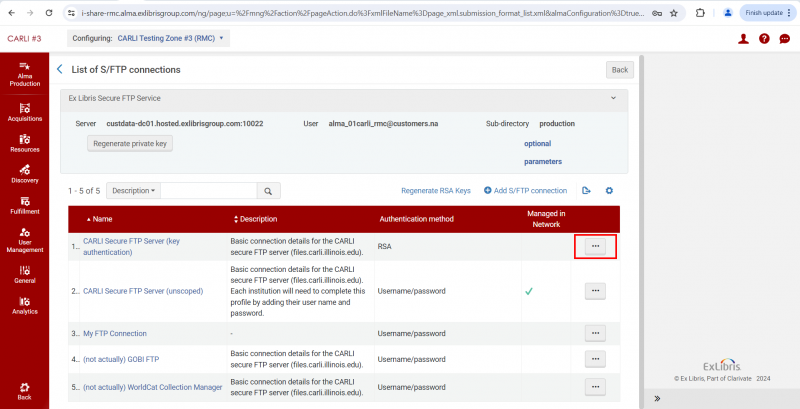
- On the “List of S/FTP connections” page, look for the S/FTP connection titled “CARLI Secure FTP Server (key authentication)”. In this example, it is connection #1. (If you do not see this S/FTP connection listed, please contact CARLI support for assistance.)
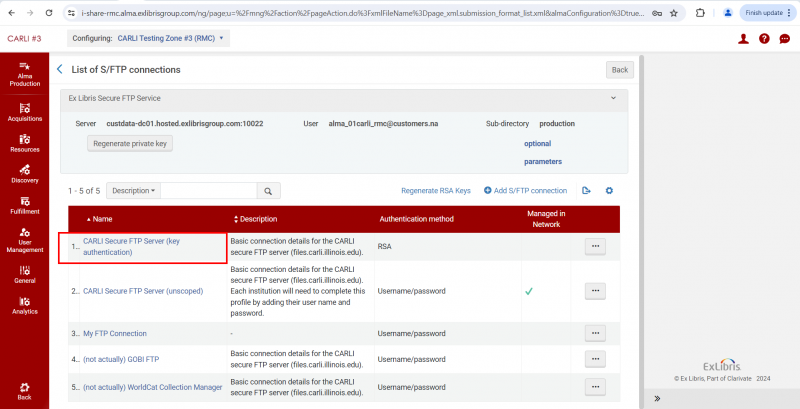
- Go to the far right of the screen across from “CARLI Secure FTP Server (key authentication)” and look for the “More actions” ellipsis button “…”.
- Click on the “More actions” button and select “Edit”.
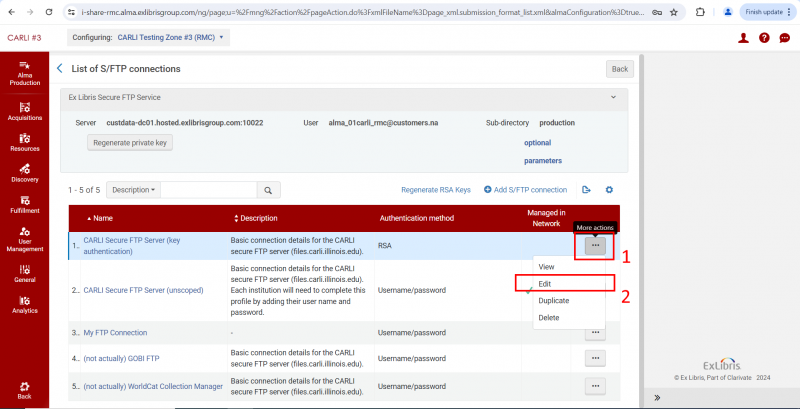
That will open this S/FTP connection.
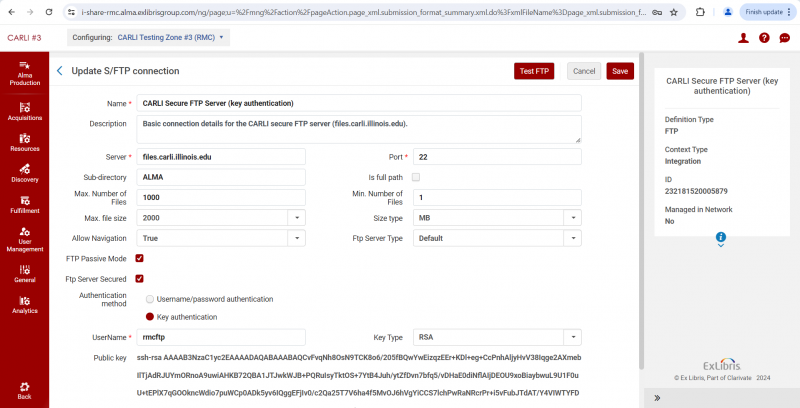
- Click the “Test FTP” button in the upper right corner of the screen.
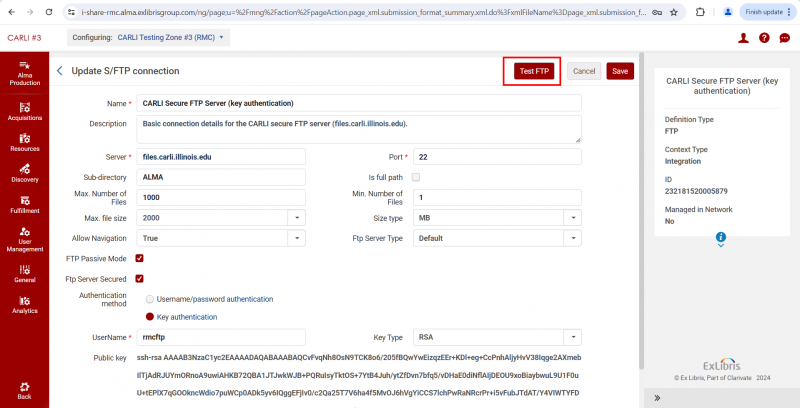
- If the test was successful, you will see 3 success messages appear in the upper right corner of the screen:
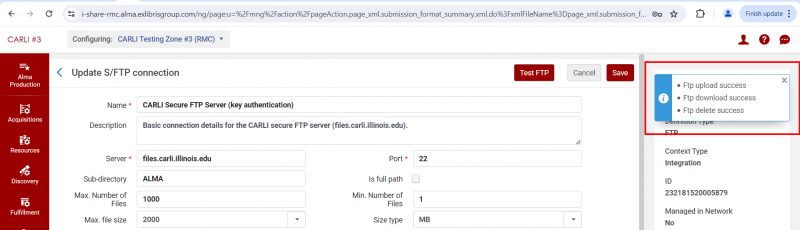
- “Ftp upload success”
- “Ftp download success”
- “Ftp delete success”
- If the test was unsuccessful, contact CARLI Support for assistance regarding the “CARLI Secure FTP Server (key authentication)” connection for your institution.
- Go to the far right of the screen across from “CARLI Secure FTP Server (key authentication)” and look for the “More actions” ellipsis button “…”.
- Once the test of the “CARLI Secure FTP Server (key authentication” S/FTP definition is successful, you will be able to utilize this S/FTP definition when you are configuring the delivery of the report in the “Scheduling an Analytics Object report for delivery” section.
- You can now leave Alma configuration by clicking the “Back” button found on the bottom left corner of the screen.

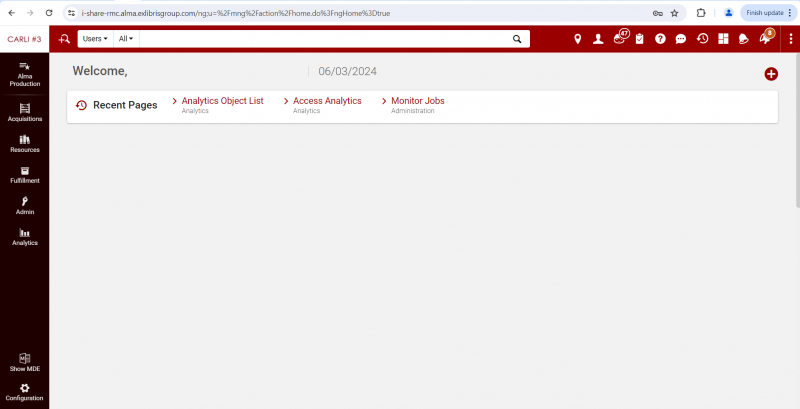
- That will return you to the Alma main menu screen.
- You can now leave Alma configuration by clicking the “Back” button found on the bottom left corner of the screen.
Working with the Analytics Object List: Roles Required
Note: To work with Analytics Objects, your user account must have one of the following roles:
Analytics Administrator
General System Administrator
Please refer to the Ex Libris page on Managing User Roles if you need to add a role or determine if your user account has one of these two roles.
Creating an Analytics Object in the Analytics Object List
Note: The procedure below will create an Analytics object for a report that already exists within Analytics. For this example, the report is located within Analytics in the following location: Catalog > Shared Folders > Carli NETWORK 01CARLI_NETWORK > Reports. The report is named “Loans Per Patron From 3 Days Ago”. This report that we will be using from Alma Analytics is a sample report and may not obtain the data that your library would need from Alma before it is anonymized.
To create an Analytics Object in the Analytics Object List
- Log into Alma
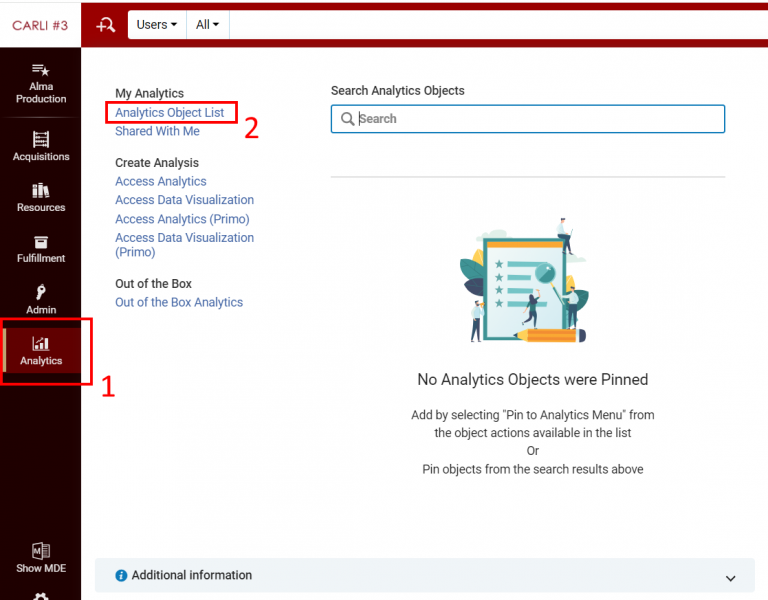
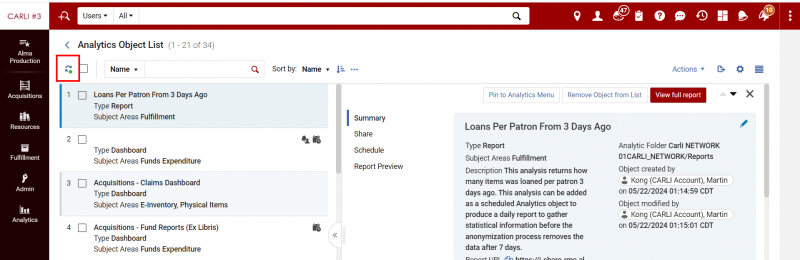
- From the Alma left menu bar, select Analytics > My Analytics > Analytics Object List
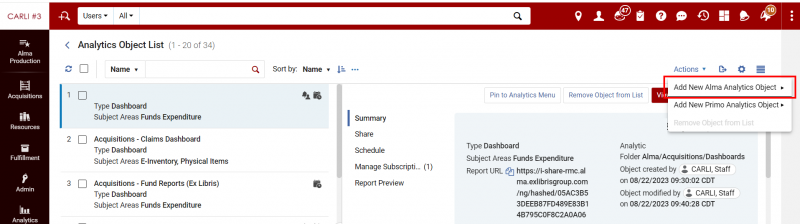
- On upper right of the Analytics Object list screen, click the "Actions" button
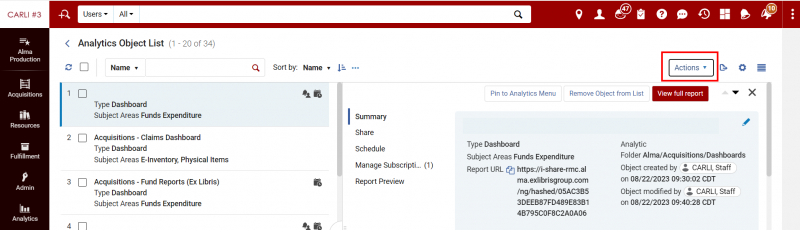
- Select “Add New Alma Analytics Object”.
- A small pop-up window will appear.
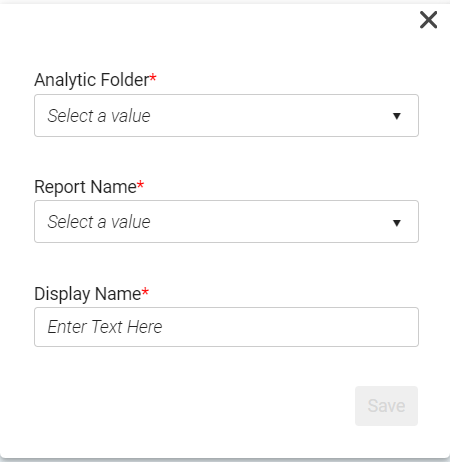
- In the Analytic Folder field, locate and select the folder that the report resides in.
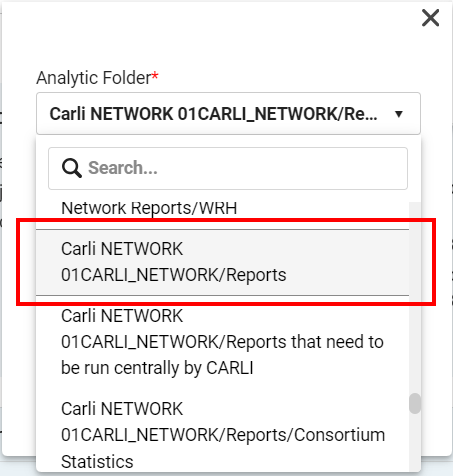
In this case, we will select “Carli NETWORK 01CARLI_NETWORK/Reports”
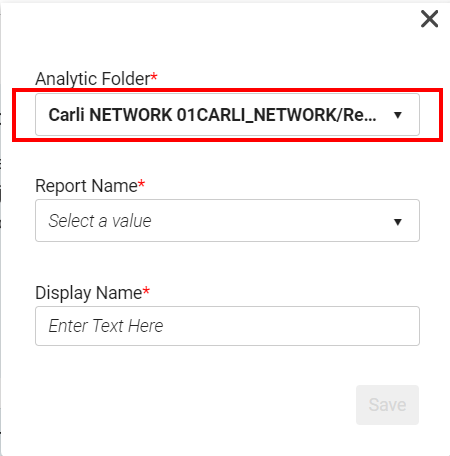
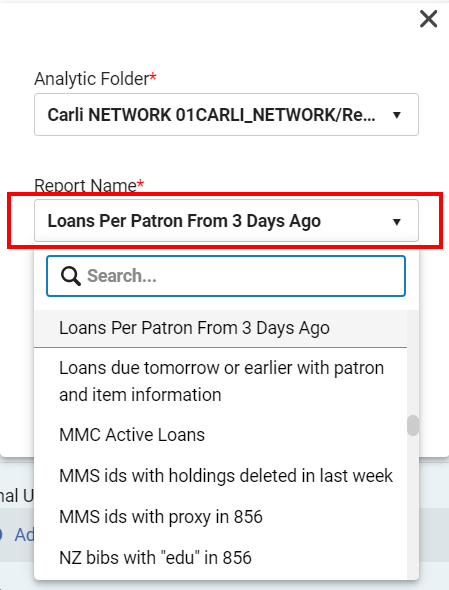
- In the Report Name field, locate and select the report name “Loans Per Patron From 3 Days Ago”.
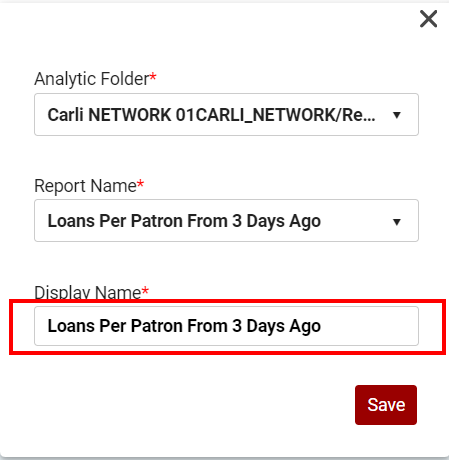
- The Display Name field will be automatically populated. You can choose to change the display name, or leave it unchanged. We will leave it unchanged.
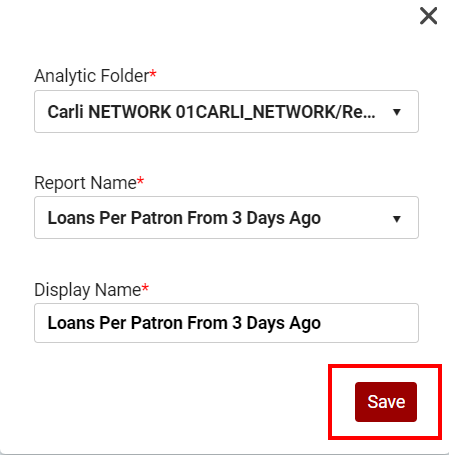
- Click Save.
- A small pop-up window will appear.
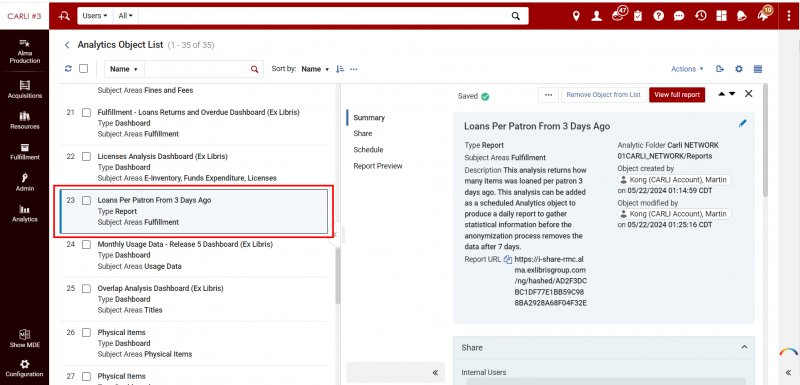
- It may take a few minutes for Alma to add this new Analytics Object to the list. Once the item has been added, it will initially appear at the very top of the list.
- However, if you click on the refresh button found immediately above the listing of Analytic objects, this new Analytic object that was added will be interfiled with the existing Analytics Objects based on the chosen sort order of the list (which is currently by “Name”).
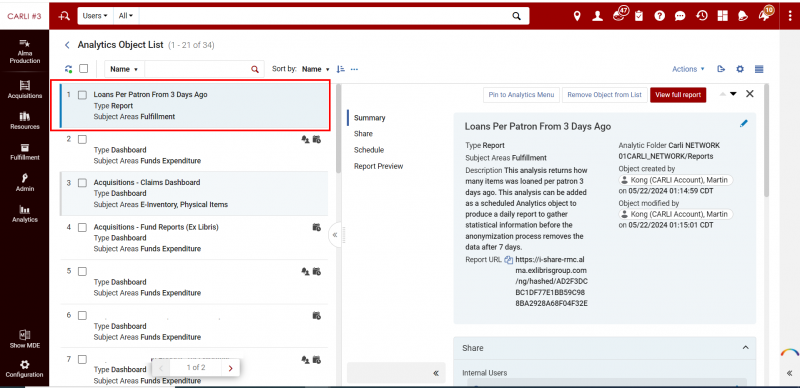
- This analytics object “Loans Per Patron From 3 Days Ago” has been successfully added to the Analytics Object List.
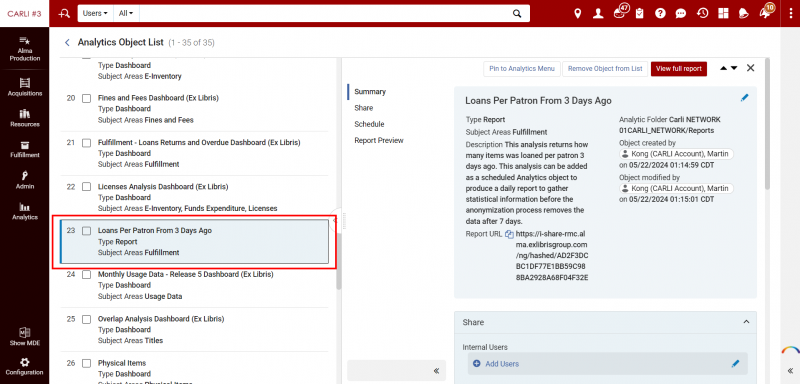
- However, if you click on the refresh button found immediately above the listing of Analytic objects, this new Analytic object that was added will be interfiled with the existing Analytics Objects based on the chosen sort order of the list (which is currently by “Name”).
- Select “Add New Alma Analytics Object”.
Scheduling an Analytics Object report for delivery via FTP
Note: the following procedure presumes that the Analytics Object has been already created/added to the Analytics Object List. If that has not been completed yet, please refer to the section above titled “Creating an Analytics Object in the Analytics Object List”. Additionally, the following procedure presumes that the S/FTP definition “CARLI Secure FTP Server (key authentication)” has been tested and is confirmed to be working. If you have not yet tested that S/FTP definition, please refer to the section above titled “Testing the S/FTP connection definition “CARLI Secure FTP Server (key authentication)” is configured and working”.
To schedule an Analytics Object report for delivery via FTP:
- Log into Alma
- From the Alma left menu bar, select Analytics > My Analytics > Analytics Object List
- From the list of Analytics objects, locate the Analytics Object titled “Loans Per Patron From 3 Days Ago” and click on it to select it.
- The right pane of the Analytics Object list user interface will show details about this object.
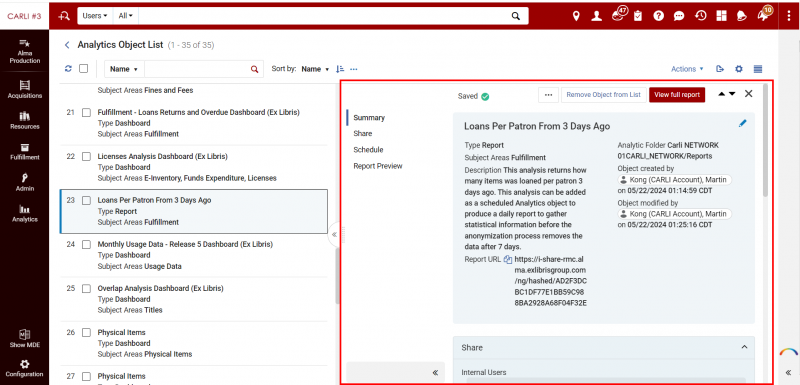
- Scroll down in that right pane and locate the “Schedule” section.
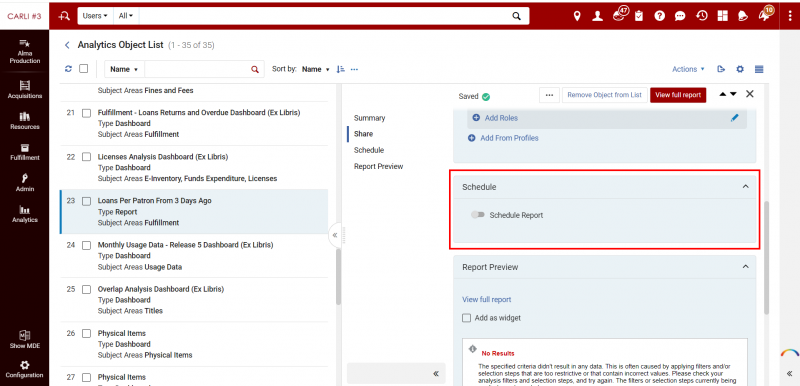
- Click the “Schedule Report” toggle button to begin scheduling this object.
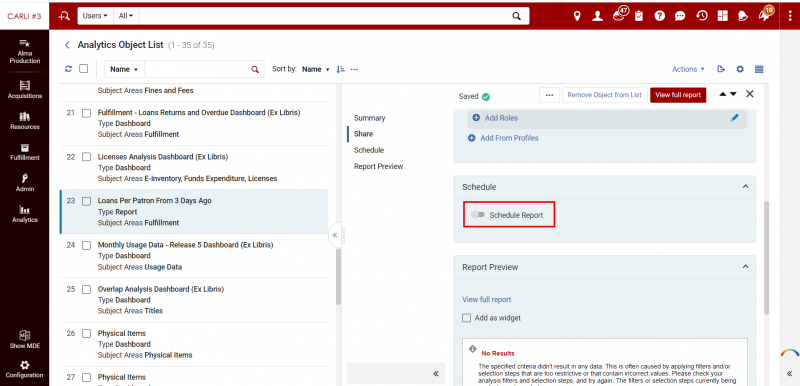
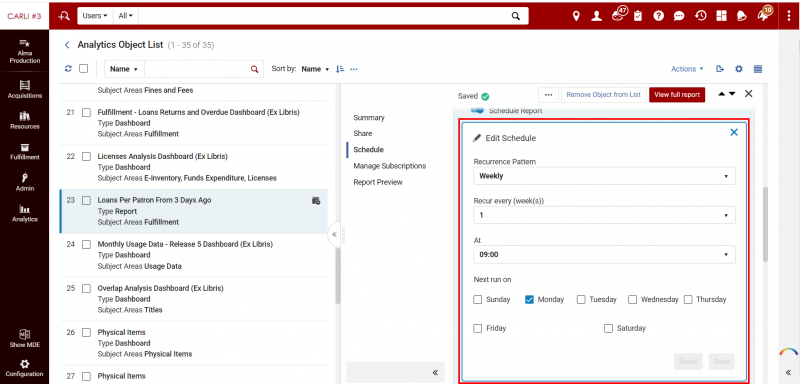
For the purposes of anonymization, we will need to schedule this report to be run daily. Additionally, we will have it run every morning at 7:00am before the library opens (to allow for the Alma to Analytics transfer process from the previous evening to complete). Below is a screenshot of the “Schedule Report” section before any configuration.
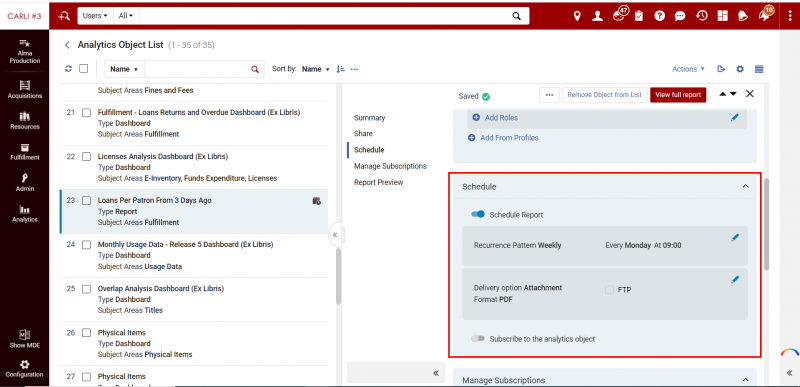
- Click on the “Recurrence Pattern” section under “Schedule Report”.
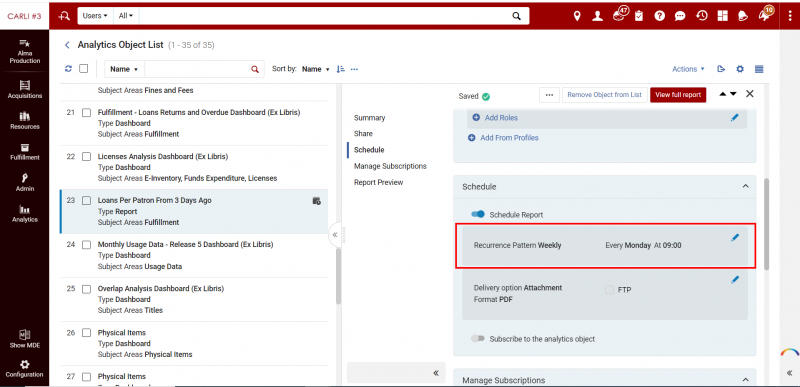
That will open a small window in the same right pane where you can edit the schedule.
- Under “Recurrence Pattern”, choose “Daily”.
- Under “Recur every (day(s))”, choose “1”.
- Under “At” choose “07:00”
- Under “Next run on”, choose the next day (so that the report will begin running the very next day). In this example, we will choose Monday (but you should choose what the actual next day will be, if you want it to begin running tomorrow).
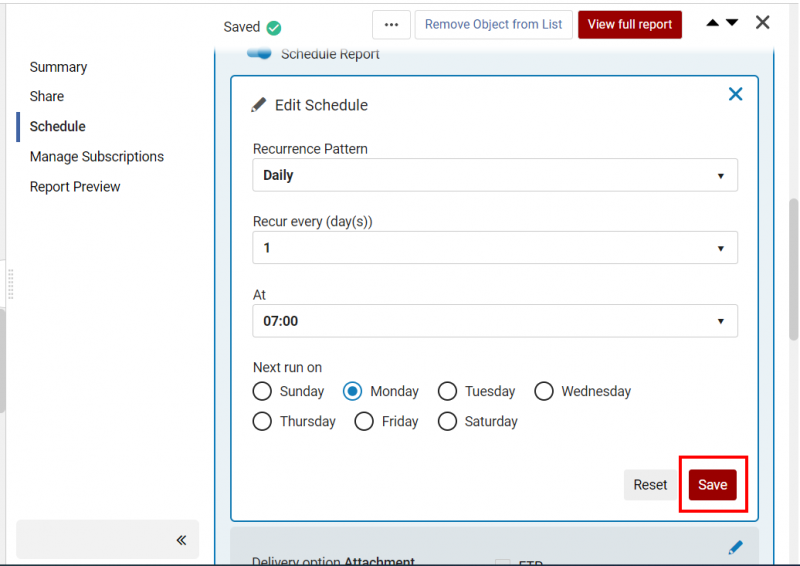
- The following is a screenshot showing all of the above choices selected for the Edit Schedule screen. Review all of the setting choices that were made.
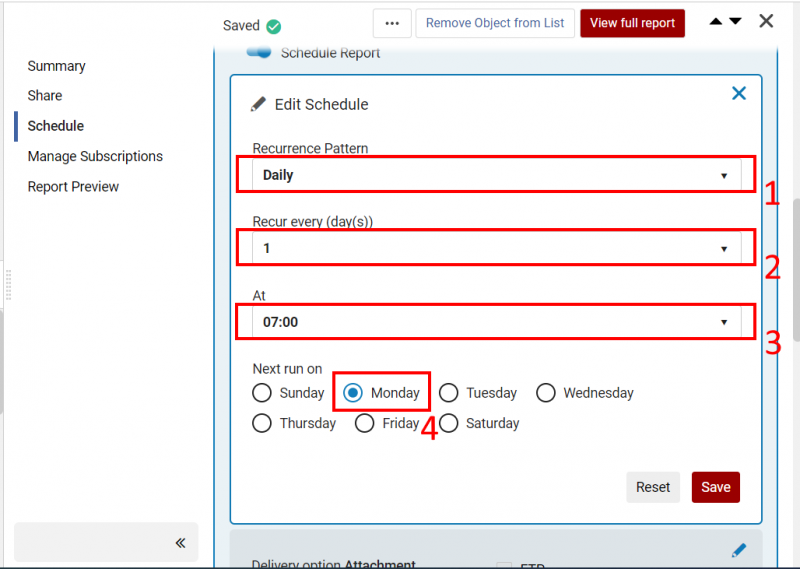
- Click “Save” when ready.
- Click on the “Delivery Option” section under “Schedule Report”.
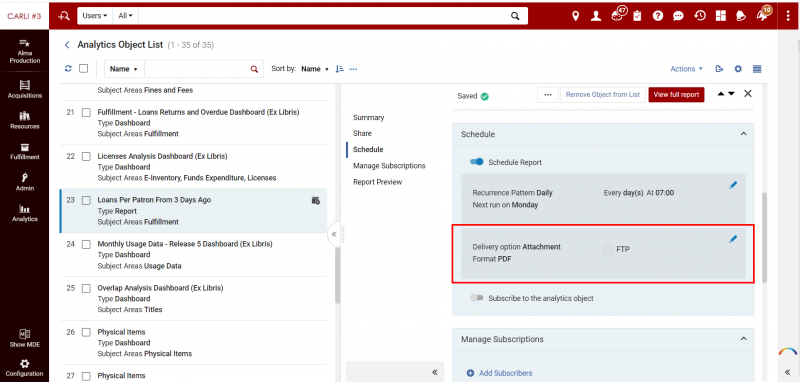
That will open a small window in the same right pane where you can edit the delivery options. The report will be sent via FTP. Note: CARLI does not recommend the use of the email delivery method. It is not recommended that reports with possible personally identifiable information (PII) be sent via email.
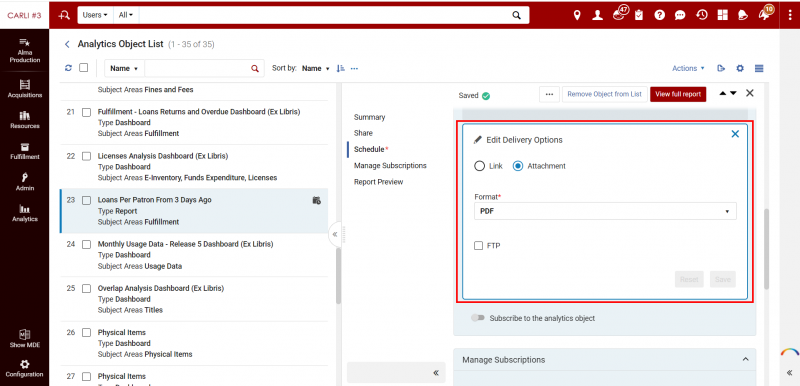
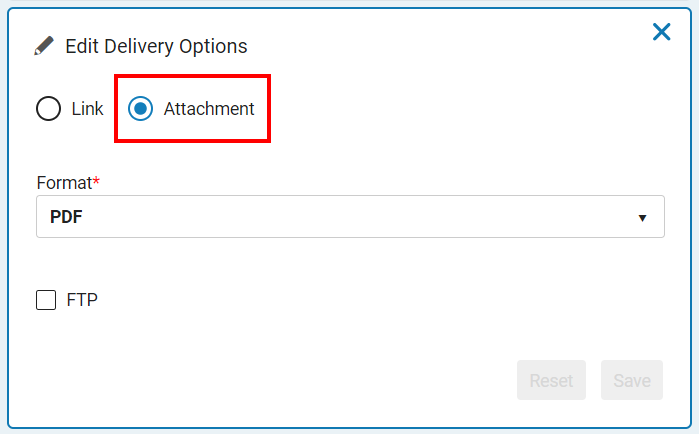
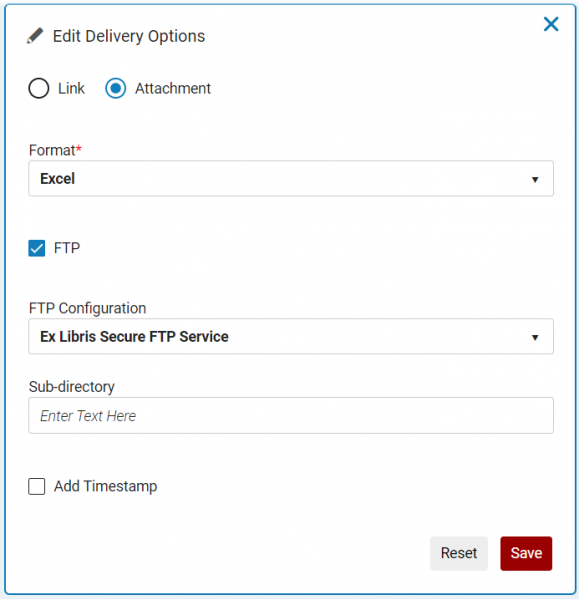
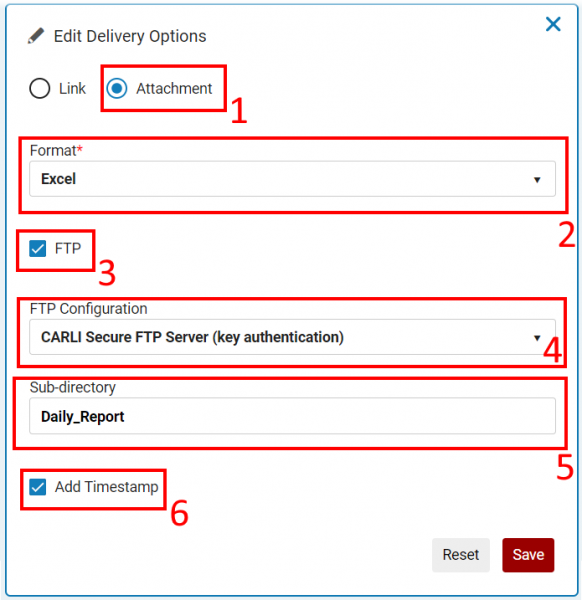
- There are two radio buttons displayed: “Link” and “Attachment”. Visually confirm that that the “Attachment” method should already be selected; if it is not, click the radio button for “Attachment” to choose that option. Selecting “Attachment” will allow us to configure delivery of the report via FTP in a few moments.
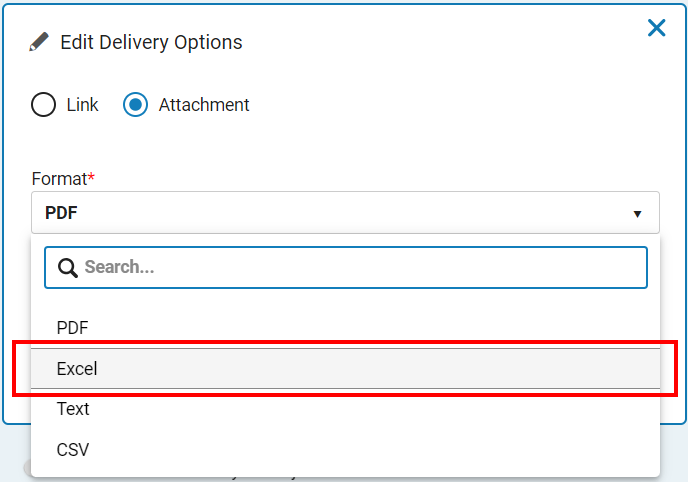
- In the “Format” field, choose “Excel” from the drop-down list.
- Click the “FTP” checkbox to enable delivery of the report via FTP.
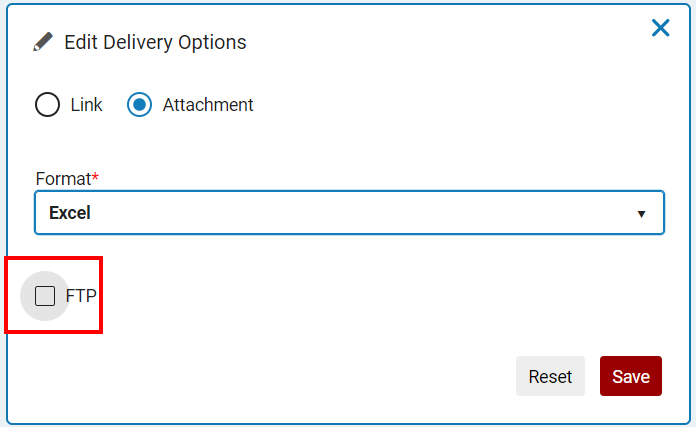
That will open up some additional options related to FTP configuration.
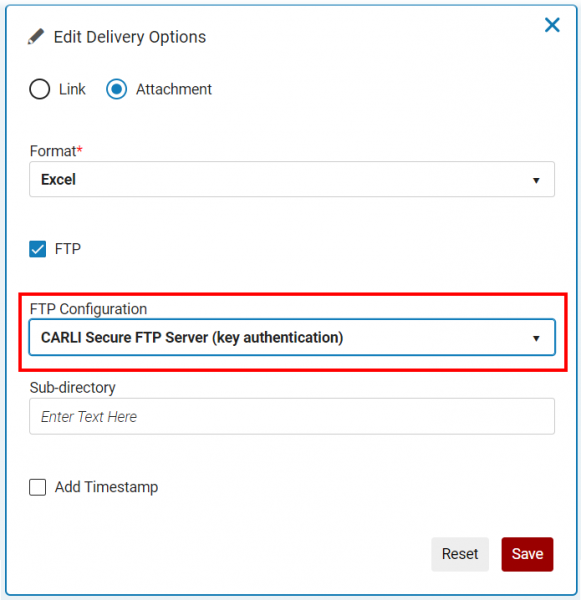
- In the “FTP Configuration” field, choose “CARLI Secure FTP Server (key authentication)”.
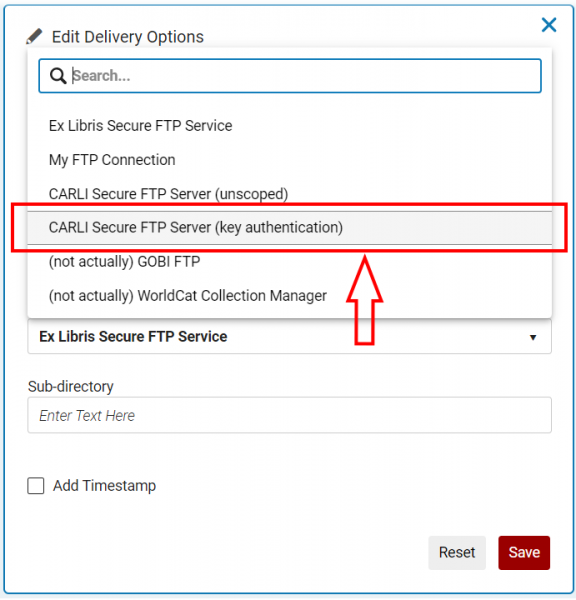
- Choosing this option presumes that the FTP service “CARLI Secure FTP Server (key authentication)” has been tested and confirmed as working; more information about how to do that can be found in the “Testing the S/FTP connection definition “CARLI Secure FTP Server (key authentication)” is configured and working” section of the documentation.
- Choosing this option presumes that the FTP service “CARLI Secure FTP Server (key authentication)” has been tested and confirmed as working; more information about how to do that can be found in the “Testing the S/FTP connection definition “CARLI Secure FTP Server (key authentication)” is configured and working” section of the documentation.
- In the “Sub-directory” field, type “Daily_Report” (the folder name is case sensitive and has no spaces). That will place these reports into the /upload/ALMA/Daily_Report folder for your institution on the CARLI Files server. The use of a sub-directory allows these reports to be kept separate from other reports and statistics that may also be regularly uploaded into the FTP folder. Note: if you look in your institution's CARLI FTP folder, it is possible that this “Daily_Report” folder will not yet exist. This “Daily_Report” folder would not exist in the CARLI FTP folder (unless you manually created the folder and/or have previously sent other scheduled Alma reports into this folder) for your institution until the first scheduled analytics report is delivered by Alma into this folder; you do not have to create it, Alma will create this folder if it does not already exist when delivering the report.
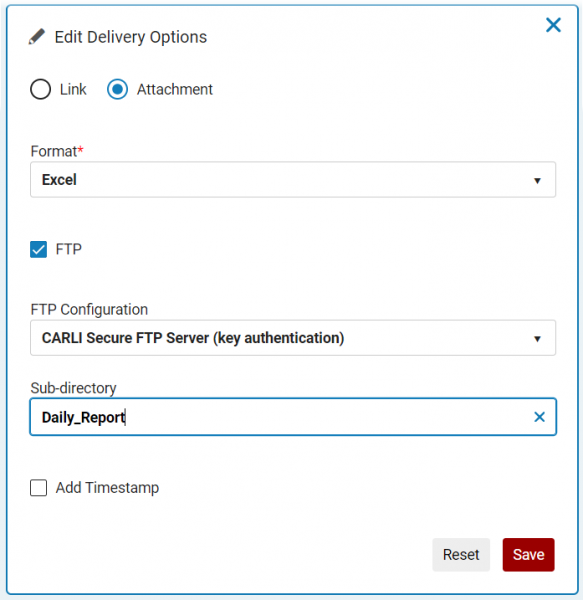
- Click the checkbox “Add Timestamp” to add a timestamp to the end of each report that Alma uploads into the FTP folder. That will make the filename of the report unique and prevent overwriting of the previous file uploaded by Alma.
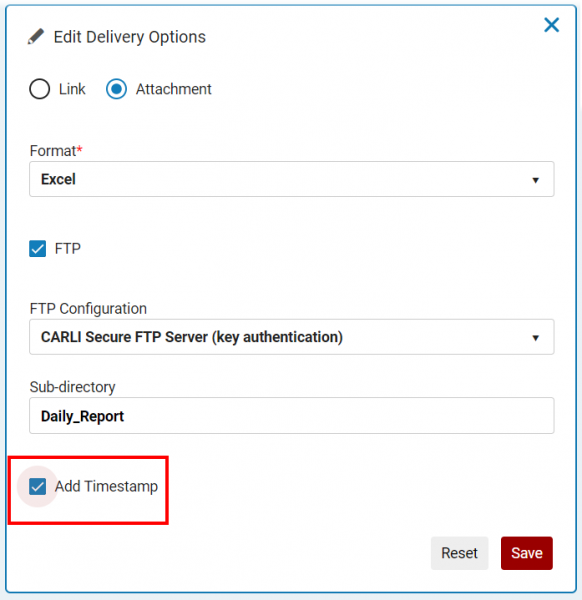
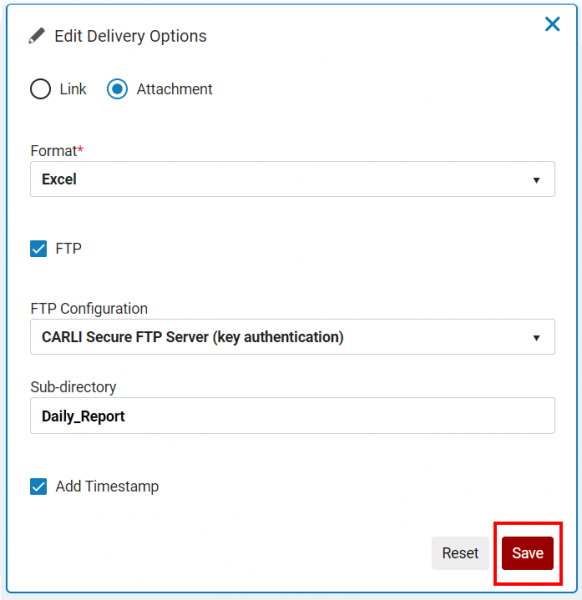
- The following is a screenshot showing all of the above choices selected for the Edit Delivery Options screen. Review all of the setting choices that were made.
- Click “Save” when ready.
- There are two radio buttons displayed: “Link” and “Attachment”. Visually confirm that that the “Attachment” method should already be selected; if it is not, click the radio button for “Attachment” to choose that option. Selecting “Attachment” will allow us to configure delivery of the report via FTP in a few moments.
- Click the “Schedule Report” toggle button to begin scheduling this object.
- The right pane of the Analytics Object list user interface will show details about this object.
- This completes the process for scheduling an Analytics Object report for delivery via FTP.
- There are some considerations with regards to the delivery of reports via FTP to the CARLI Files server:
- On the CARLI Files server, all files are deleted automatically after 60 days, so you or someone at your institution will need to regularly download the Alma reports delivered via FTP to your institution’s FTP folder on the CARLI Files server. CARLI’s recommendation is that you should download the reports from your institution’s FTP folder every month (~30 days); since the files are deleted after 60 days, that should provide enough time to obtain the necessary files before they are automatically deleted from the CARLI Files server.
- Please see the section “Downloading of the reports delivered via FTP to your institution’s FTP folder on the CARLI Files server” for more information about how to download these reports on a regular basis.
Downloading of the reports delivered via FTP to your institution’s FTP folder on the CARLI Files server
Note: the following presumes that you have already scheduled an Analytics Object list item to regularly deliver a report via FTP to your institution’s FTP folder on the CARLI Files server. If that has not yet been completed, please see the section above titled “Scheduling an Analytics Object report for delivery via FTP”. Additionally, it is important to remember that you or someone at your institution should download the reports every month (~30 days) from the CARLI Files server. The CARLI Files server will automatically delete all files that have been present on the server for 60 days, performing the download of the reports every 30 days should allow sufficient time to download necessary files before they are deleted.
To download the reports delivered via FTP to your institution’s FTP folder on the CARLI Files server:
- Read Transferring Data Files to and from the CARLI Servers using Secure FTP for the steps on how to connect to your institution’s FTP folder on the CARLI Files Server.
- Note: The above steps explain how to connect to the CARLI Files server using the WinSCP client. There are included steps on how to install the WinSCP program as well if needed. The following screenshots and procedural steps within WinSCP presume that the “Commander” type interface is in use.

WinSCP also offers an “Explorer” type interface, but that will not be demonstrated here.
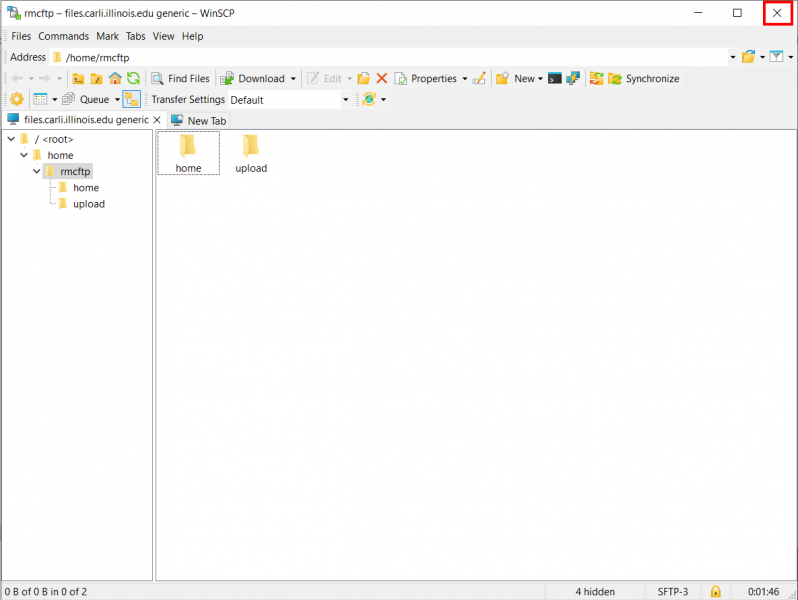
- If you do have the “Explorer” type interface enabled for WinSCP and would like to switch to the “Commander” type interface:
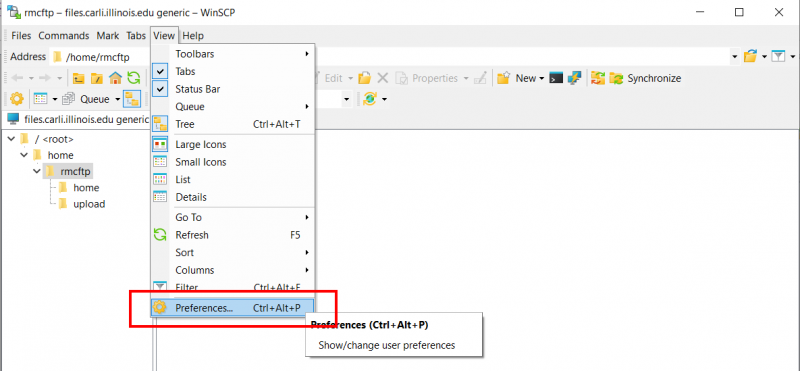
- Click on “View > Preferences…” in the File menu bar of the WinSCP program.
- In the Environment section, click on “Interface”.
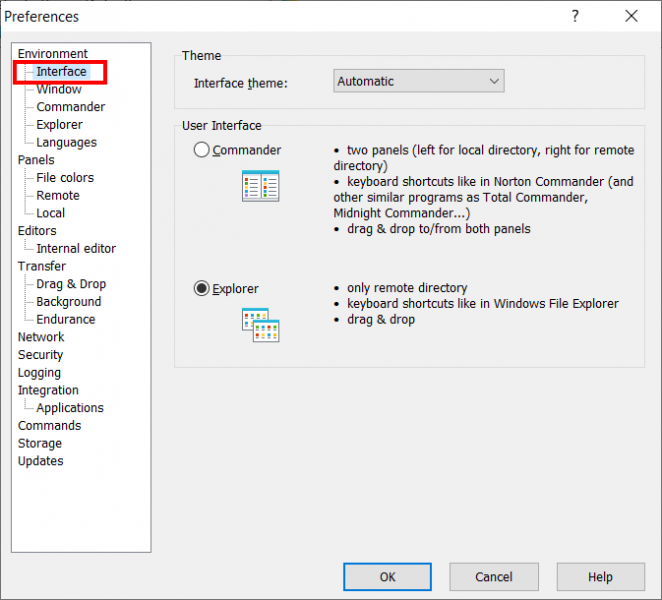
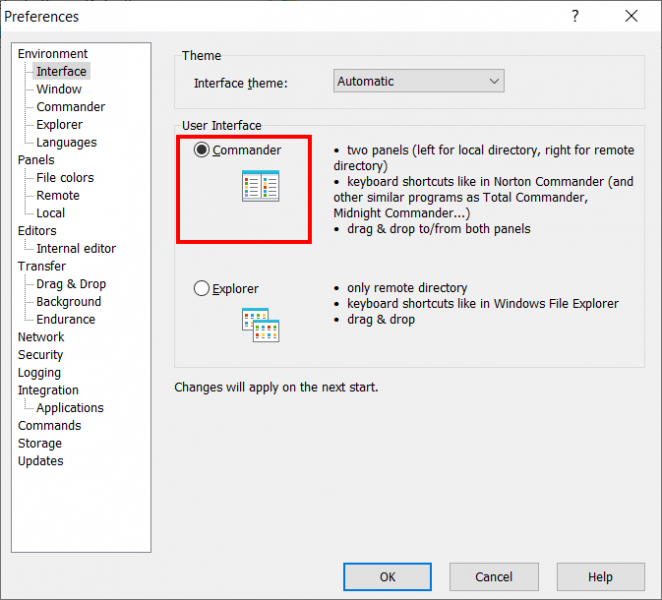
- In the right side of the screen, under “User Interface”, click on the “Commander” radio button to enable the “Commander” interface type.
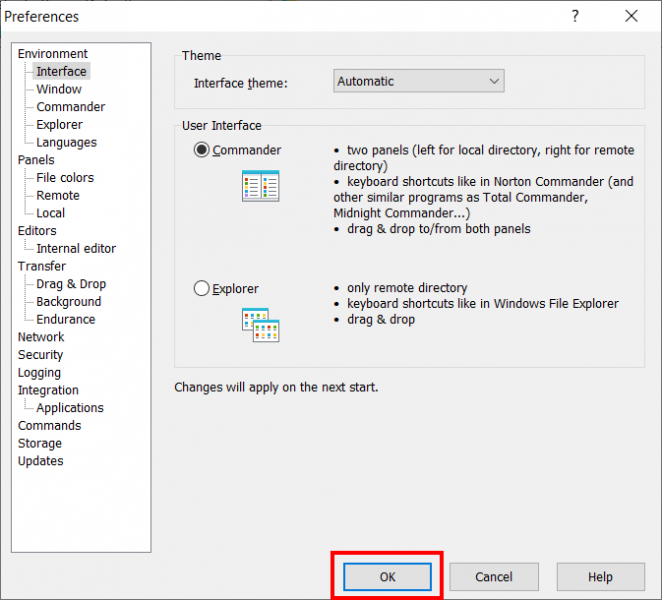
- Click “OK” to close the WinSCP Preferences window.
- Click the “X” button in the upper right corner of WinSCP. That will close the WinSCP program. WinSCP will utilize the “Commander” type interface after you exit the program fully and re-open WinSCP.
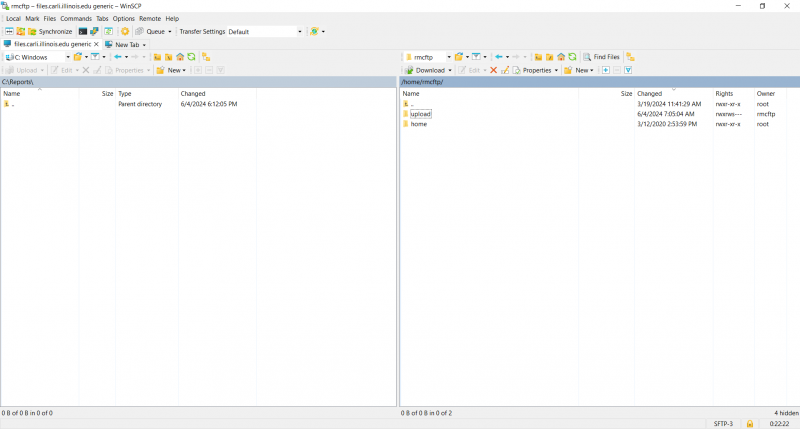
- Re-open the WinSCP program and log into the CARLI Files server using the previously referenced “Transferring Data Files to and from the CARLI Servers using Secure FTP” instructions. WinSCP should now be utilizing a “Commander” type interface.
- Click on “View > Preferences…” in the File menu bar of the WinSCP program.
- If you do not know the username/password needed to access the CARLI Files server FTP folder for your library, please contact your library’s I-Share liaison and/or reach out to CARLI Support for assistance.
- If you do have the “Explorer” type interface enabled for WinSCP and would like to switch to the “Commander” type interface:
- Note: The above steps explain how to connect to the CARLI Files server using the WinSCP client. There are included steps on how to install the WinSCP program as well if needed. The following screenshots and procedural steps within WinSCP presume that the “Commander” type interface is in use.
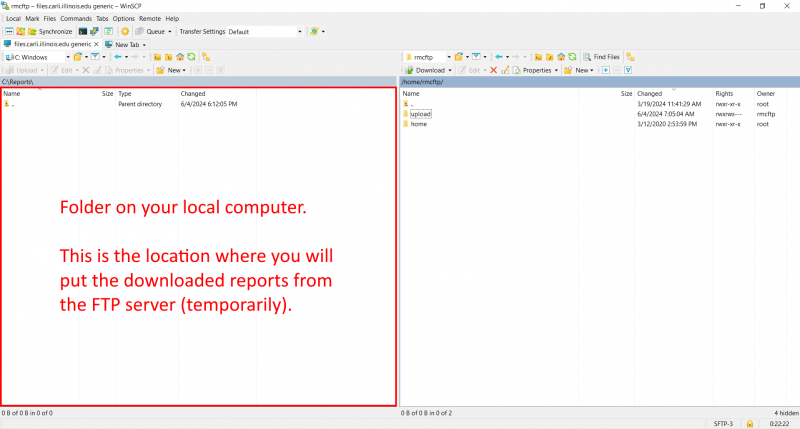
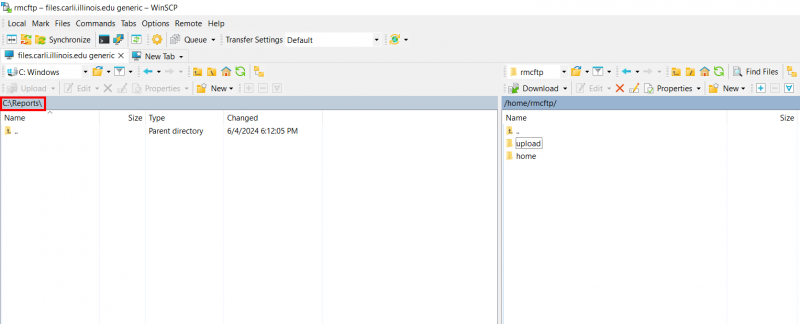
- After you have successfully logged into the CARLI Files server using WinSCP, on the left pane navigate to where you would like to save the downloaded reports (on your local computer).
- For the left pane, you can navigate to the appropriate local folder that you would like to use by clicking on the “folder/drive” selector drop-down menu found in the toolbar above the left pane.
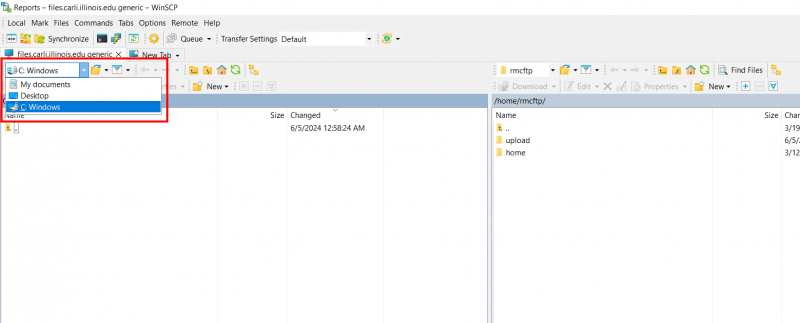
- You can also use the yellow “up” arrow within the left pane window to navigate back to a previous folder level from your current position.
- Note: as the reports may contain personally identifiable information, this chosen folder should be considered a temporary storage location. For this demonstration, the location is C:\reports (but can be any folder location on your local computer of your choosing).
- For the left pane, you can navigate to the appropriate local folder that you would like to use by clicking on the “folder/drive” selector drop-down menu found in the toolbar above the left pane.
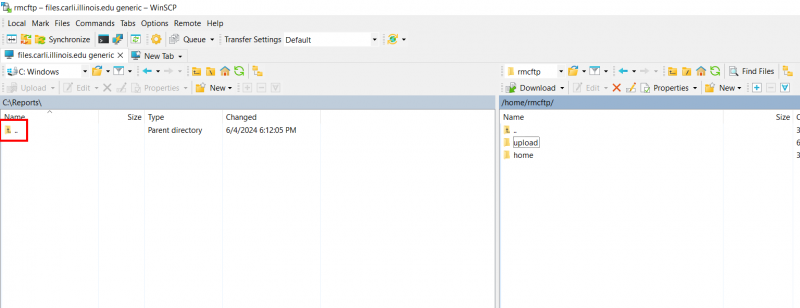
- In your institution’s FTP folder on the CARLI Files server, the reports will be located in a sub-folder called “Daily_Report” that is located within the Alma folder. You will need to navigate to the following folder location in the right pane of the WinSCP program: /home/xxxftp/upload/ALMA/Daily_Report/, where xxx is your institution’s 3 letter code.
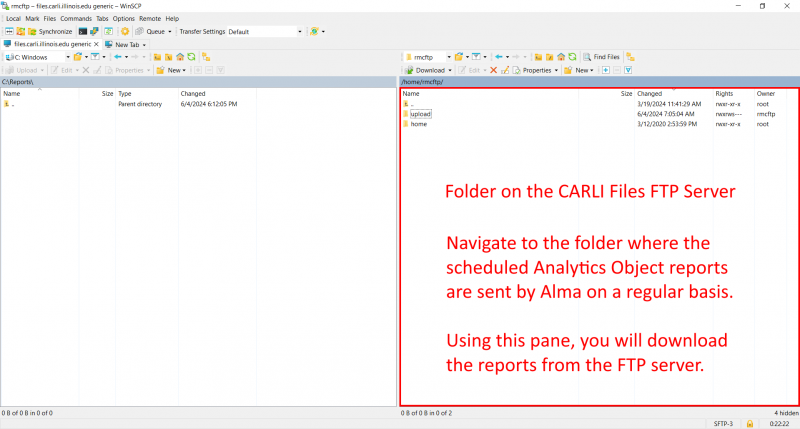
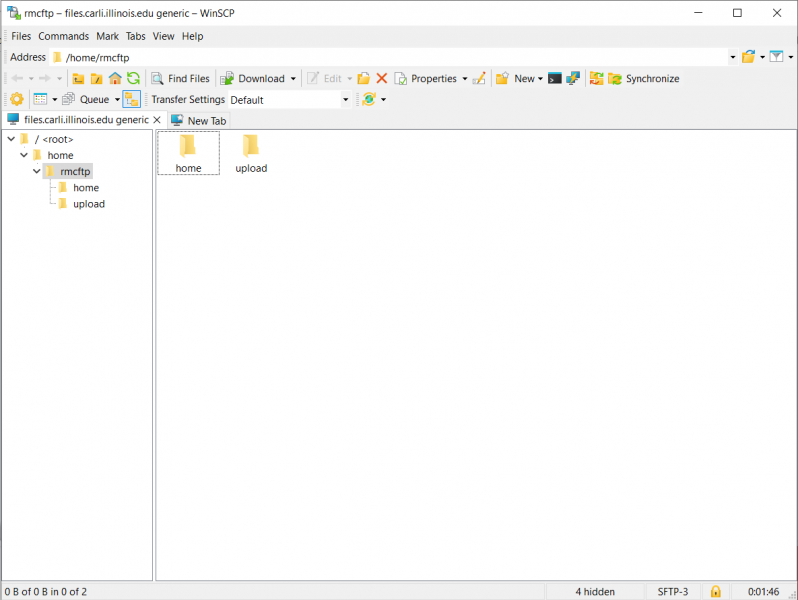
- In the right pane of WinSCP, after login, I am currently located at the /home/xxxftp/ folder. There are two available folders within this folder: “upload” and “home”.
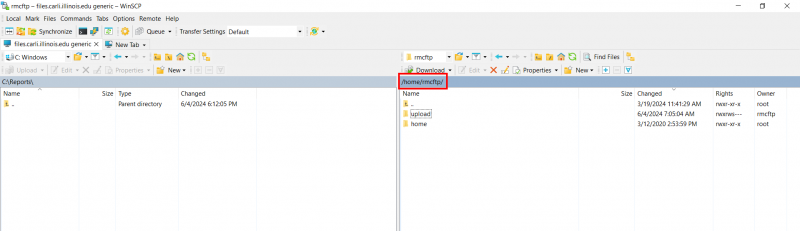
- Navigate into the “upload” folder by double-clicking on that folder in the right pane.
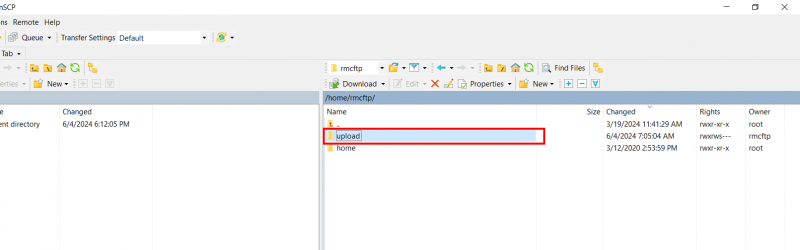
You now see the contents of the “upload” folder in the right pane.
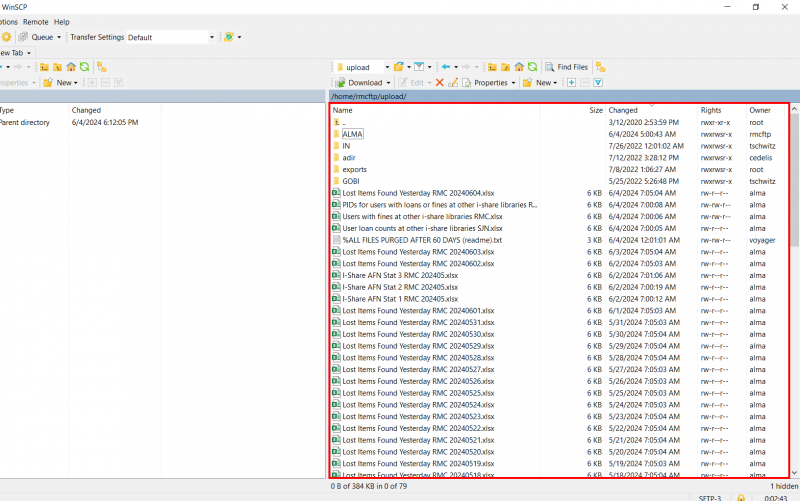
- Navigate into the “ALMA” folder by double-clicking on that folder in the right pane.
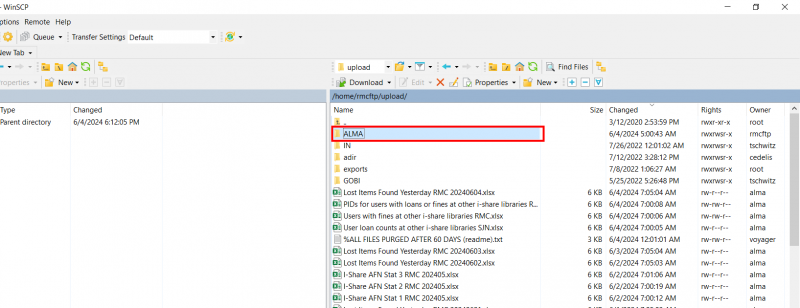
You now see the contents of the “ALMA” folder in the right pane.
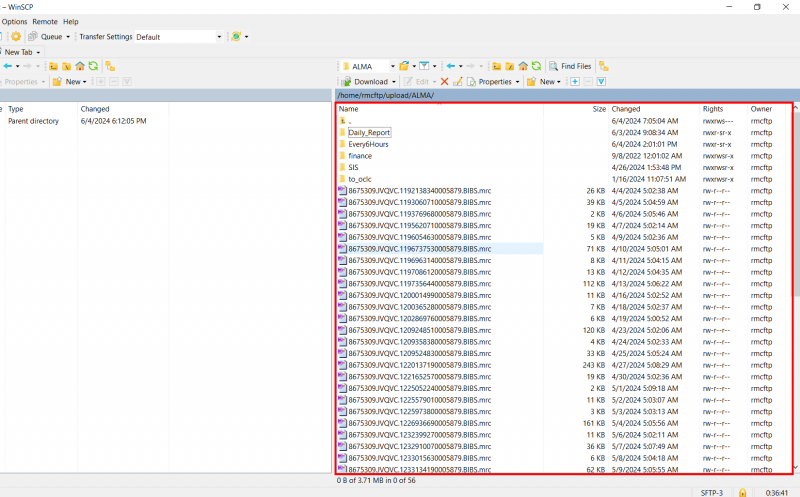
- Navigate into the “Daily_Report” folder by double-clicking on that folder in the right pane.

This is the folder on the FTP server where Alma deposited the scheduled Analytics object list reports.
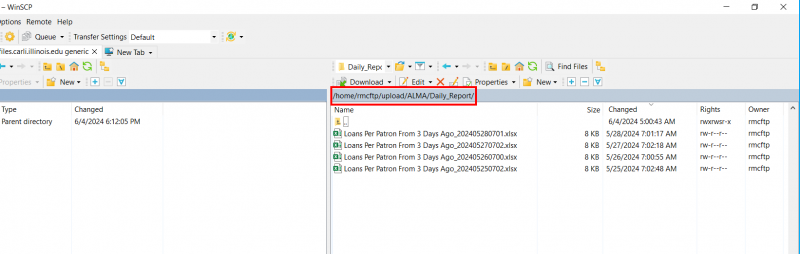
- The example Analytics object list report that was scheduled to run produces a report daily that is delivered at 7:00am.
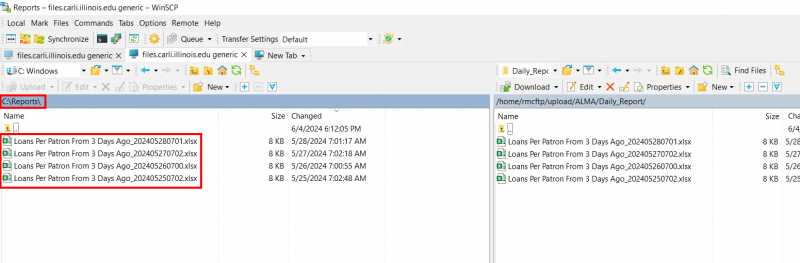
- In the screenshot below, you can see that there are currently four reports available for download.
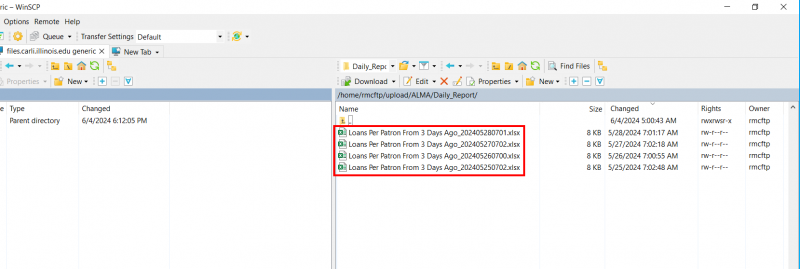
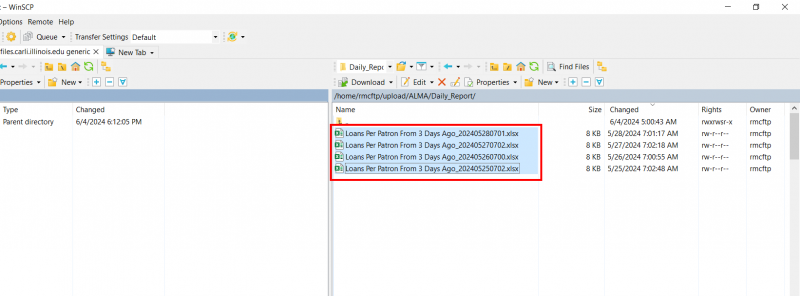
- While holding the Ctrl key, click and select all the reports in the right pane that you want to download; the selected reports will be highlighted.
- Note: If you are downloading reports into the same local folder on your computer on a regular basis, you may need to review which files you already have saved locally and do not select/highlight those files on the right pane (located on the FTP server) for downloading as that may cause file duplication.
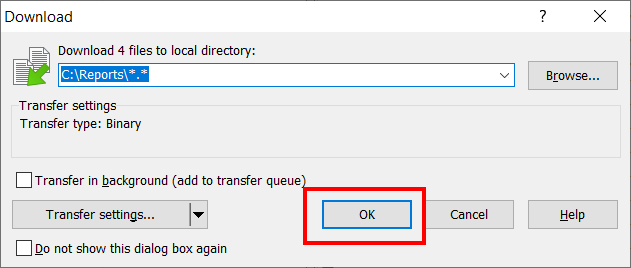
- Drag the selected reports from the right pane to the left pane to download the reports to your computer to save them. Click “OK” on the small Download pop-up window that appears.
- Once the files have all been completely transferred, you will see them appear on the left pane. They have been successfully downloaded onto your local computer into the folder that you have chosen.
- In the screenshot below, you can see that there are currently four reports available for download.
- In the right pane of WinSCP, after login, I am currently located at the /home/xxxftp/ folder. There are two available folders within this folder: “upload” and “home”.
Verification of the received reports on a regular basis
It is important to regularly check the received reports that are delivered via FTP to verify the following:
- The reports are still being sent by Alma on the established schedule.
- The reports contain the expected data.
Note: the data in Alma Analytics is only available 7 days after a transaction is completed before it is anonymized. If there is concern about the loss of data that is anonymized after 7 days, someone at your library may want to check that the reports are functioning properly once a week. If a report stops functioning that contains data that will be anonymized, after 7 days you will no longer be able to retrieve the data. The frequency upon which you verify the reports being delivered by FTP are working properly is ultimately a local decision for your institution.
The procedural steps needed to access the reports delivered by the Alma Analytics object into your institution’s FTP folder on the CARLI Files server for verification purposes are very similar to the steps needed to download the report files from the FTP folder. The only difference is that instead of downloading the report files, we will be opening an Excel report file on the FTP folder to confirm that the report has the data that is expected.
To verify a report received via FTP:
- Read Transferring Data Files to and from the CARLI Servers using Secure FTP for the steps on how to connect to your institution’s FTP folder on the CARLI Files Server.
- Note: The above steps explain how to connect to the CARLI Files server using the WinSCP client. There are included steps on how to install the WinSCP program as well if needed. The following screenshots and procedural steps within WinSCP presume that the “Commander” type interface is in use.
WinSCP also offers an “Explorer” type interface, but that will not be demonstrated here.
- If you do have the “Explorer” type interface enabled for WinSCP and would like to switch to the “Commander” type interface:
- Click on “View > Preferences…” in the File menu bar of the WinSCP program.
- In the Environment section, click on “Interface”.
- In the right side of the screen, under “User Interface”, click on the “Commander” radio button to enable the “Commander” interface type.
- Click “OK” to close the WinSCP Preferences window.
- Click the “X” button in the upper right corner of WinSCP. That will close the WinSCP program. WinSCP will utilize the “Commander” type interface after you exit the program fully and re-open WinSCP.
- Re-open the WinSCP program and log into the CARLI Files server using the previously referenced “Transferring Data Files to and from the CARLI Servers using Secure FTP” instructions. WinSCP should now be utilizing a “Commander” type interface.
- Click on “View > Preferences…” in the File menu bar of the WinSCP program.
- If you do not know the username/password needed to access the CARLI Files server FTP folder for your library, please contact your library’s I-Share liaison and/or reach out to CARLI Support for assistance.
- If you do have the “Explorer” type interface enabled for WinSCP and would like to switch to the “Commander” type interface:
- Note: The above steps explain how to connect to the CARLI Files server using the WinSCP client. There are included steps on how to install the WinSCP program as well if needed. The following screenshots and procedural steps within WinSCP presume that the “Commander” type interface is in use.
- In your institution’s FTP folder on the CARLI Files server, the reports will be located in a sub-folder called “Daily_Report” that is located within the Alma folder. You will need to navigate to the following folder location in the right pane of the WinSCP program: /home/xxxftp/upload/ALMA/Daily_Report/, where xxx is your institution’s 3 letter code.
- In the right pane of WinSCP, after login, I am currently located at the /home/xxxftp/ folder. There are two available folders within this folder: “upload” and “home”.
- Navigate into the “upload” folder by double-clicking on that folder in the right pane.
You now see the contents of the “upload” folder in the right pane.
- Navigate into the “ALMA” folder by double-clicking on that folder in the right pane.
You now see the contents of the “ALMA” folder in the right pane.
- Navigate into the “Daily_Report” folder by double-clicking on that folder in the right pane.
This is the folder on the FTP server where Alma deposited the scheduled Analytics object list reports.
- In the right pane of WinSCP, after login, I am currently located at the /home/xxxftp/ folder. There are two available folders within this folder: “upload” and “home”.
-
- The example Analytics object list report that was scheduled to run is supposed to produce a report daily that is delivered at 7:00am.
- We want to confirm that the Analytics Object is still producing the report on the expected schedule.
- In the screenshot below, you can see that there are currently four reports available in the right pane. The scheduled Analytics Object appears to be producing a report output every day at approximately 7:00am.
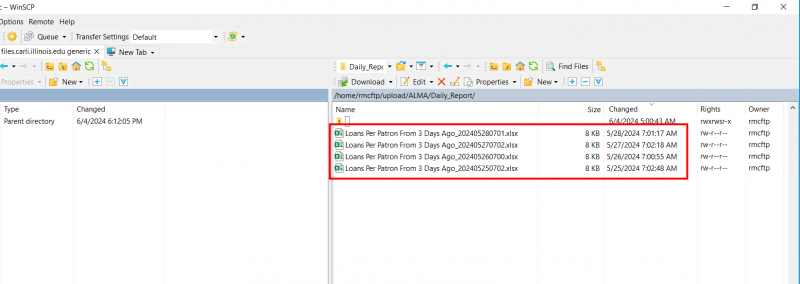
- In the screenshot below, you can see that there are currently four reports available in the right pane. The scheduled Analytics Object appears to be producing a report output every day at approximately 7:00am.
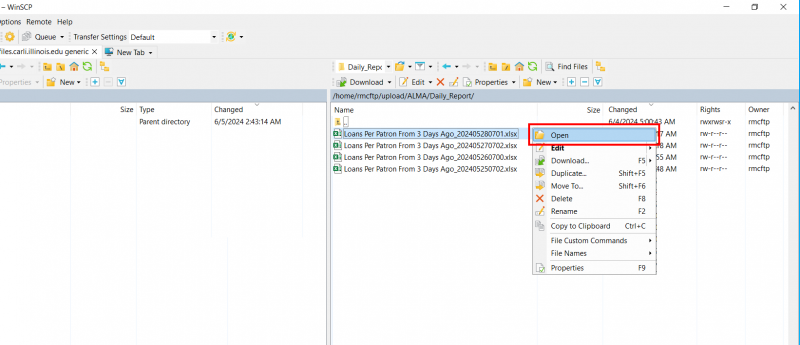
- The next step is to confirm that the report contains data. We will open the latest report (by date) in Excel and see if it contains data.
- Right click on the most recent report and choose “Open”. That will open the report for verification purposes (the presumption is that you have Microsoft Excel or another program installed that allows for viewing of Microsoft Excel files).
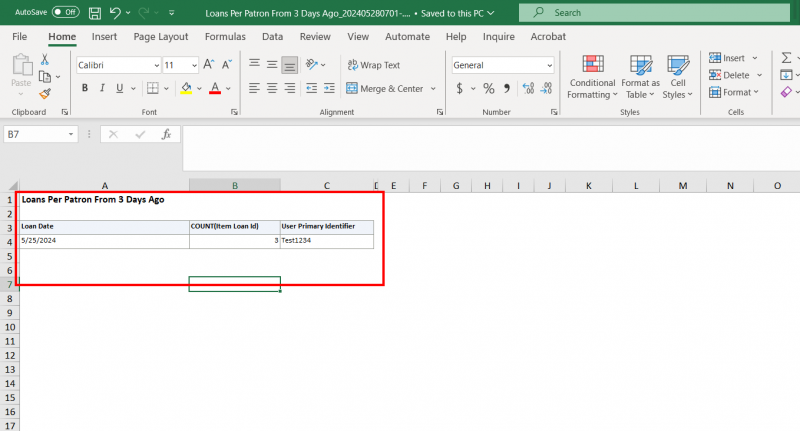
- As you can see in the example screenshot below, the report does contain data.
- Right click on the most recent report and choose “Open”. That will open the report for verification purposes (the presumption is that you have Microsoft Excel or another program installed that allows for viewing of Microsoft Excel files).
- During the verification process, if a report is found to not be functioning properly and does not return any data values, it is important to first determine if there were actual transactions that occurred during the reporting period. For example, a circulation report that looks for loans from local students 3 days ago may not return any results if it was a holiday and/or break period and there were no circulation transactions 3 days prior.
- Here is a screenshot of an example report that did not return any data.
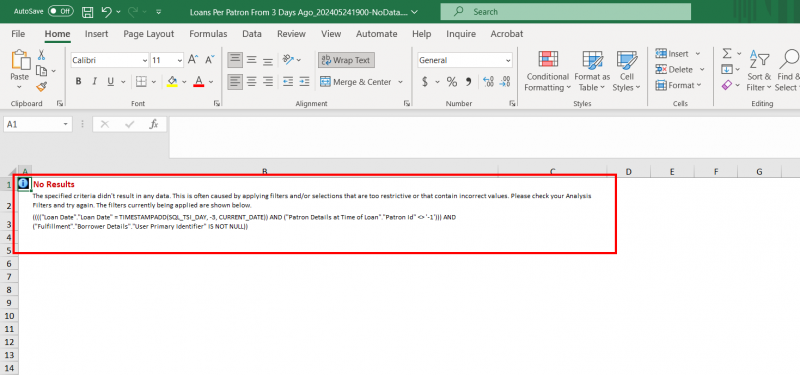
- In this example, if it is determined by your library staff that there were indeed circulation transactions for local students 3 days prior, but the report produced by the scheduled Analytics object did not return that data, you may need to review the Analytics query the Analytics object is utilizing to generate the scheduled report. Contact CARLI support if assistance is needed in reviewing the Analytics query.
- Here is a screenshot of an example report that did not return any data.
- We want to confirm that the Analytics Object is still producing the report on the expected schedule.
- The example Analytics object list report that was scheduled to run is supposed to produce a report daily that is delivered at 7:00am.
Footer
Footer Copyright
© 2026 University of Illinois Board of Trustees | Legal | U of I Privacy Notice | CARLI Privacy Notice